1. Login to your website WP admin dashboard (e.g., https://greyboxprod.wpengine.com/wp-admin/).
2. Click on ‘Pages’ in the left-hand side menu.
![](https://ajeuwbhvhr.cloudimg.io/colony-recorder.s3.amazonaws.com/files/2023-05-18/677898d8-12a0-4979-a229-ba90fd189994/ascreenshot.jpeg?tl_px=0,101&br_px=859,582&force_format=png&width=860&wat_scale=76&wat=1&wat_opacity=0.7&wat_gravity=northwest&wat_url=https://colony-recorder.s3.us-west-1.amazonaws.com/images/watermarks/FB923C_standard.png&wat_pad=39,212)
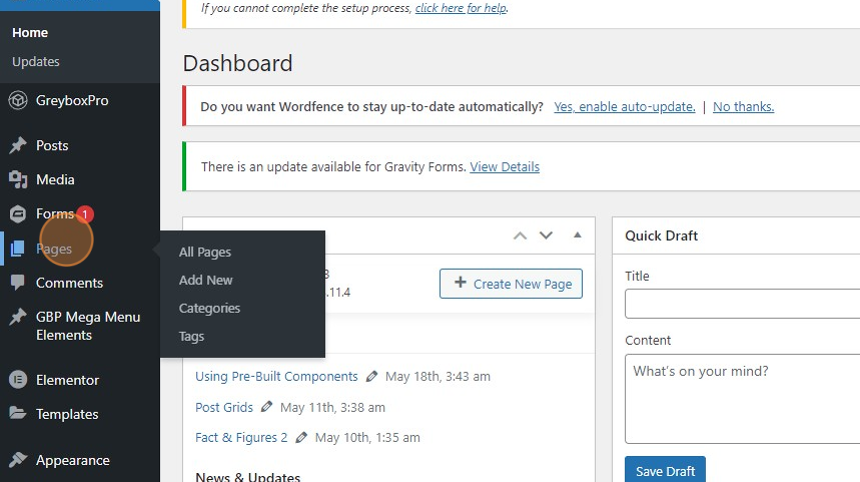
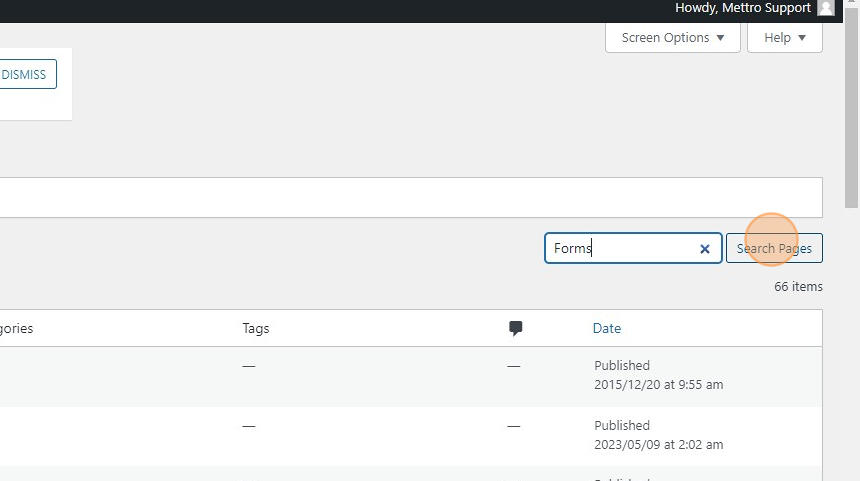
3. Once in the Pages window, type the word “Forms” on the textbox field at the right-hand side of your screen, and click the ‘Search Pages’ button.
![](https://ajeuwbhvhr.cloudimg.io/colony-recorder.s3.amazonaws.com/files/2023-05-18/2237b482-d690-473b-aa3f-5ecedb82a752/ascreenshot.jpeg?tl_px=1060,9&br_px=1920,490&force_format=png&width=860&wat_scale=76&wat=1&wat_opacity=0.7&wat_gravity=northwest&wat_url=https://colony-recorder.s3.us-west-1.amazonaws.com/images/watermarks/FB923C_standard.png&wat_pad=744,212)
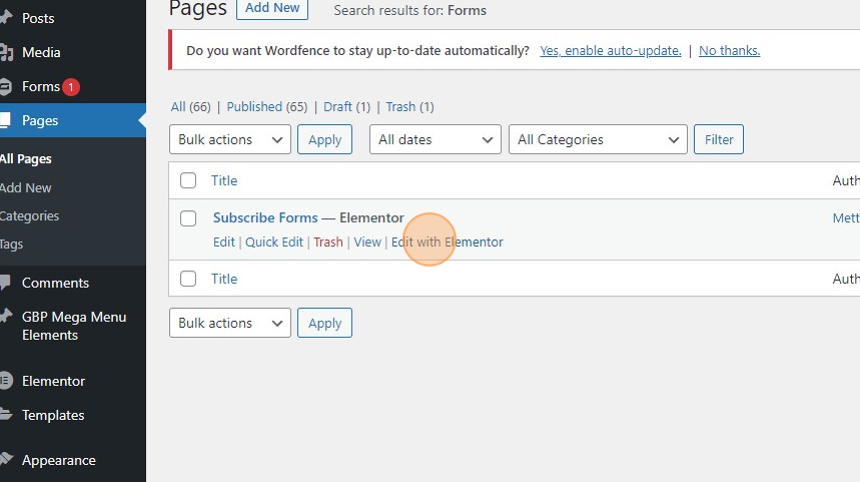
4. You will see the “Forms” page appear in the list. Under the “Forms” page, right-click ‘Edit with Elementor’ and open in a new tab.
![](https://ajeuwbhvhr.cloudimg.io/colony-recorder.s3.amazonaws.com/files/2023-05-18/9448da5b-2781-4831-a022-9d0f5f5e254d/ascreenshot.jpeg?tl_px=14,157&br_px=873,638&force_format=png&width=860&wat_scale=76&wat=1&wat_opacity=0.7&wat_gravity=northwest&wat_url=https://colony-recorder.s3.us-west-1.amazonaws.com/images/watermarks/FB923C_standard.png&wat_pad=402,212)
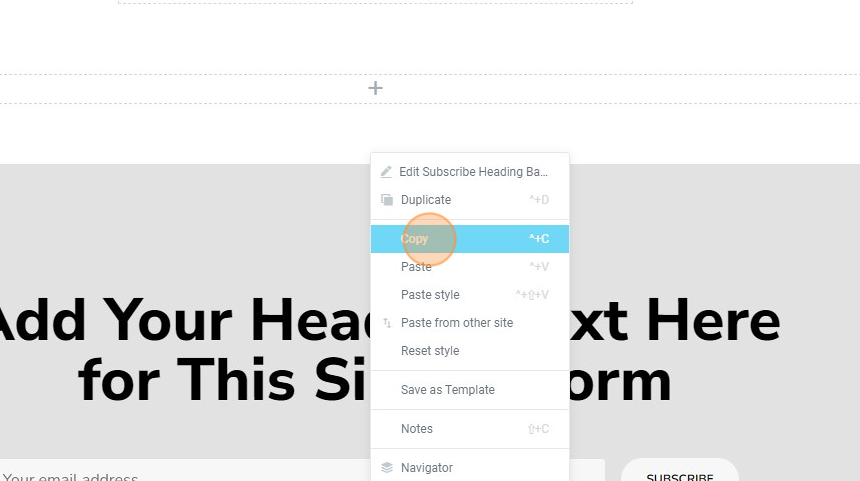
5. Scroll down the page to find a form that you like. Hover over the form to reveal a small grid icon. Right-click on it and select copy.
![](https://ajeuwbhvhr.cloudimg.io/colony-recorder.s3.amazonaws.com/files/2023-05-18/b10f90b6-db21-4bd7-8886-e914d74be87b/ascreenshot.jpeg?tl_px=726,19&br_px=1586,500&force_format=png&width=860&wat_scale=76&wat=1&wat_opacity=0.7&wat_gravity=northwest&wat_url=https://colony-recorder.s3.us-west-1.amazonaws.com/images/watermarks/FB923C_standard.png&wat_pad=402,212)
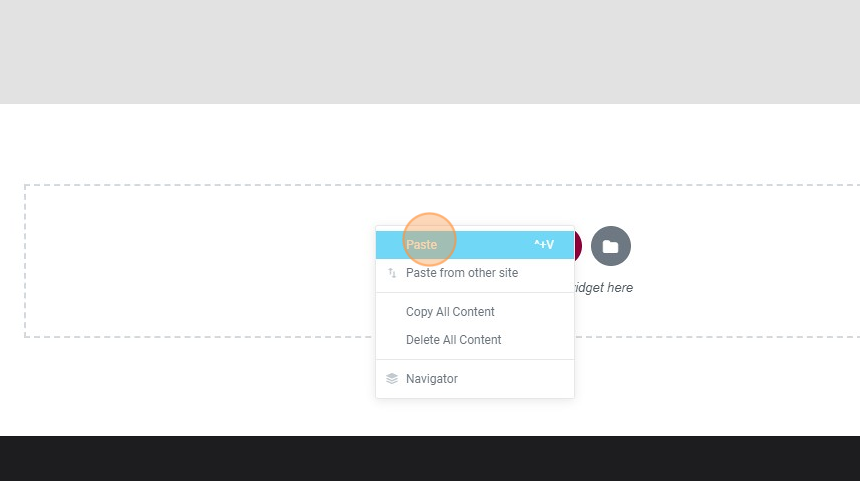
6. Open the page you want to work on in Elementor or create a new one. Switch to tab to the newly created page and paste the copied widget/section.
![](https://ajeuwbhvhr.cloudimg.io/colony-recorder.s3.amazonaws.com/files/2023-05-18/fcaa3431-f631-46b7-a96e-917a51bc3edf/ascreenshot.jpeg?tl_px=518,230&br_px=1378,711&force_format=png&width=860&wat_scale=76&wat=1&wat_opacity=0.7&wat_gravity=northwest&wat_url=https://colony-recorder.s3.us-west-1.amazonaws.com/images/watermarks/FB923C_standard.png&wat_pad=402,212)
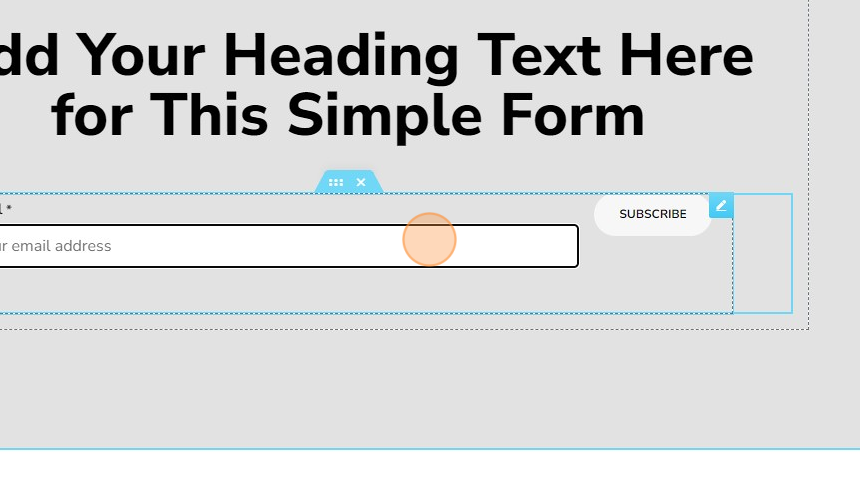
7. Click the copied section/widget to update the settings/options.
![](https://ajeuwbhvhr.cloudimg.io/colony-recorder.s3.amazonaws.com/files/2023-05-18/f0a0cdae-4d43-4742-968e-03c44412a8e7/ascreenshot.jpeg?tl_px=753,315&br_px=1613,796&force_format=png&width=860&wat_scale=76&wat=1&wat_opacity=0.7&wat_gravity=northwest&wat_url=https://colony-recorder.s3.us-west-1.amazonaws.com/images/watermarks/FB923C_standard.png&wat_pad=402,212)
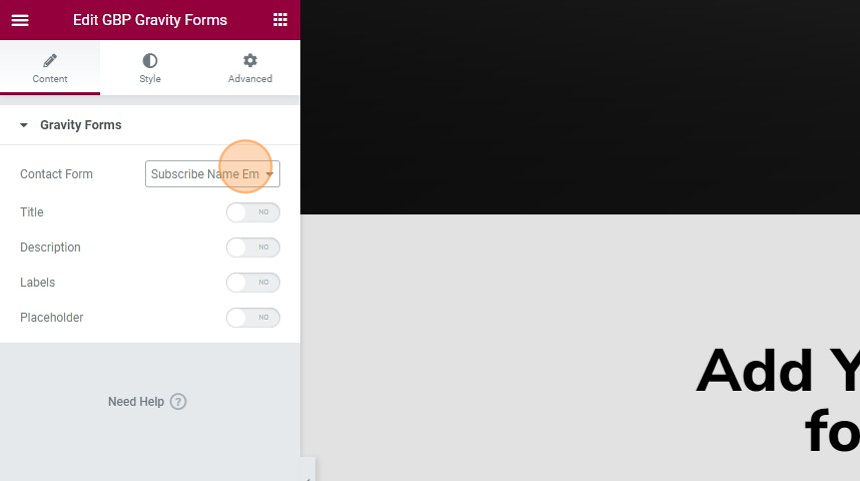
8. At first, you will see the message, “Oops! We could not locate your form.” On the left-hand panel, you will see customization options for Edit Gravity Forms. In the Contact Form dropdown, choose from the list of forms.
![](https://ajeuwbhvhr.cloudimg.io/colony-recorder.s3.amazonaws.com/files/2023-05-18/bc882226-1e87-4716-84f6-273073a19dcc/ascreenshot.jpeg?tl_px=0,0&br_px=859,480&force_format=png&width=860&wat_scale=76&wat=1&wat_opacity=0.7&wat_gravity=northwest&wat_url=https://colony-recorder.s3.us-west-1.amazonaws.com/images/watermarks/FB923C_standard.png&wat_pad=218,139)
9. If the dropdown says, “no contact forms found!”, it means, you haven’t set up your forms. Watch our how-to video, Setting up Footer Subscription Form – GreyboxPro, to learn how to set up forms.
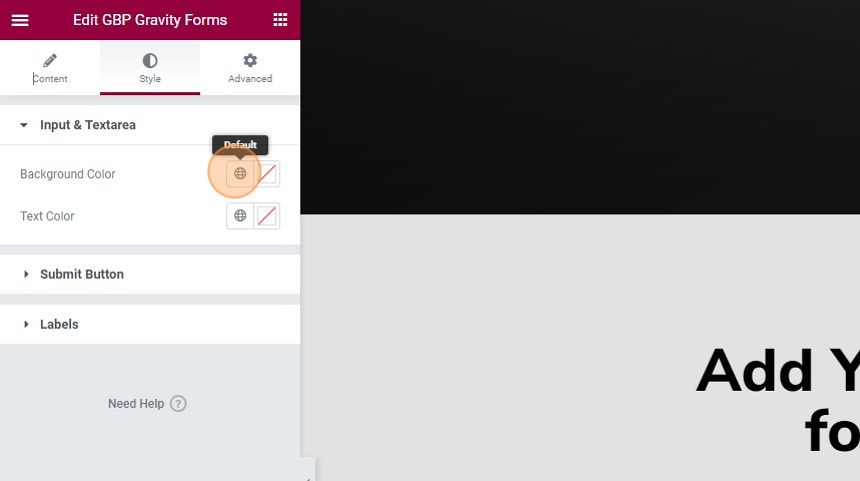
10. Click on the ‘Style’ icon to see style customization options.
![](https://ajeuwbhvhr.cloudimg.io/colony-recorder.s3.amazonaws.com/files/2023-05-18/1bd7ca8b-8cc6-43bc-bac0-1fa7b7baef76/ascreenshot.jpeg?tl_px=0,0&br_px=859,480&force_format=png&width=860&wat_scale=76&wat=1&wat_opacity=0.7&wat_gravity=northwest&wat_url=https://colony-recorder.s3.us-west-1.amazonaws.com/images/watermarks/FB923C_standard.png&wat_pad=207,144)
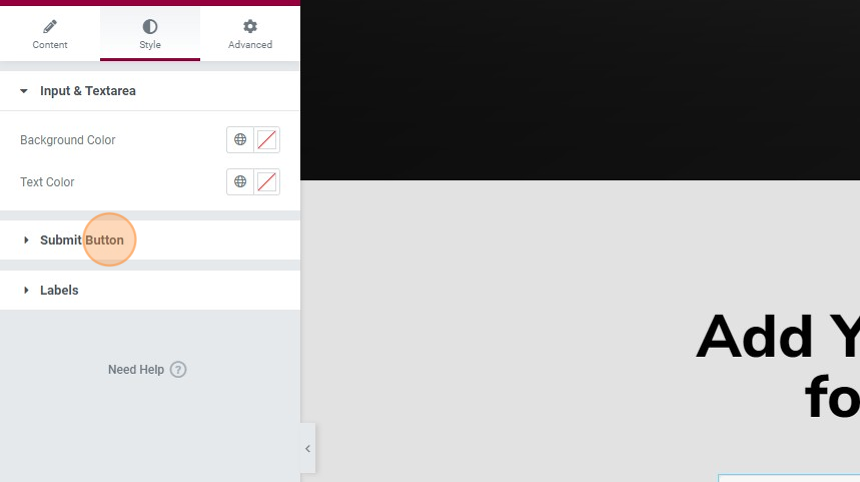
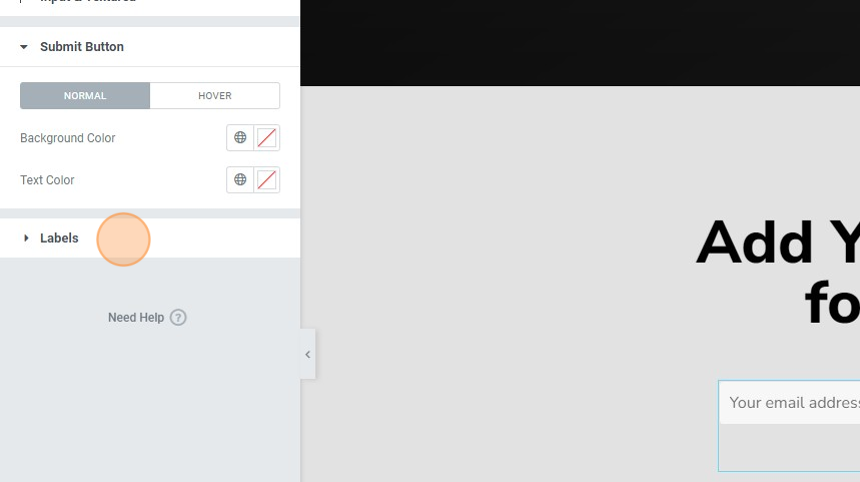
11. A lot more options are available in the ‘Style’ tab. Click on each to expand the menu. Click on the ‘Submit Button’ to change its text and background colors, and more.
![](https://ajeuwbhvhr.cloudimg.io/colony-recorder.s3.amazonaws.com/files/2023-05-18/31c69b64-85c2-4a56-8496-d79222011df5/ascreenshot.jpeg?tl_px=0,34&br_px=859,515&force_format=png&width=860&wat_scale=76&wat=1&wat_opacity=0.7&wat_gravity=northwest&wat_url=https://colony-recorder.s3.us-west-1.amazonaws.com/images/watermarks/FB923C_standard.png&wat_pad=82,212)
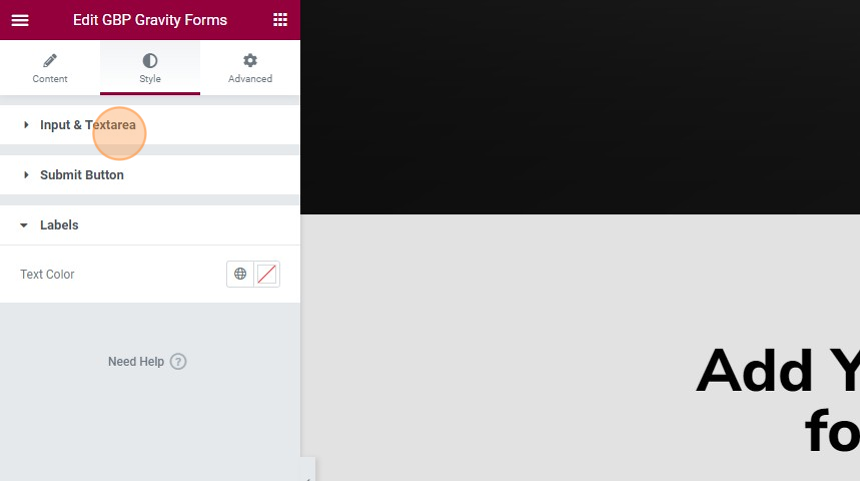
12. You can also do the same for the ‘Labels’.
![](https://ajeuwbhvhr.cloudimg.io/colony-recorder.s3.amazonaws.com/files/2023-05-18/fc2c97fa-1266-4783-8925-dddc505e8b0c/ascreenshot.jpeg?tl_px=0,128&br_px=859,609&force_format=png&width=860&wat_scale=76&wat=1&wat_opacity=0.7&wat_gravity=northwest&wat_url=https://colony-recorder.s3.us-west-1.amazonaws.com/images/watermarks/FB923C_standard.png&wat_pad=96,212)
13. You can also customize how your input and text area will look like under the ‘Input & Textarea’ button.
![](https://ajeuwbhvhr.cloudimg.io/colony-recorder.s3.amazonaws.com/files/2023-05-18/b53de840-b3af-4ccd-b45e-0ee2e9d34917/ascreenshot.jpeg?tl_px=0,0&br_px=859,480&force_format=png&width=860&wat_scale=76&wat=1&wat_opacity=0.7&wat_gravity=northwest&wat_url=https://colony-recorder.s3.us-west-1.amazonaws.com/images/watermarks/FB923C_standard.png&wat_pad=92,106)
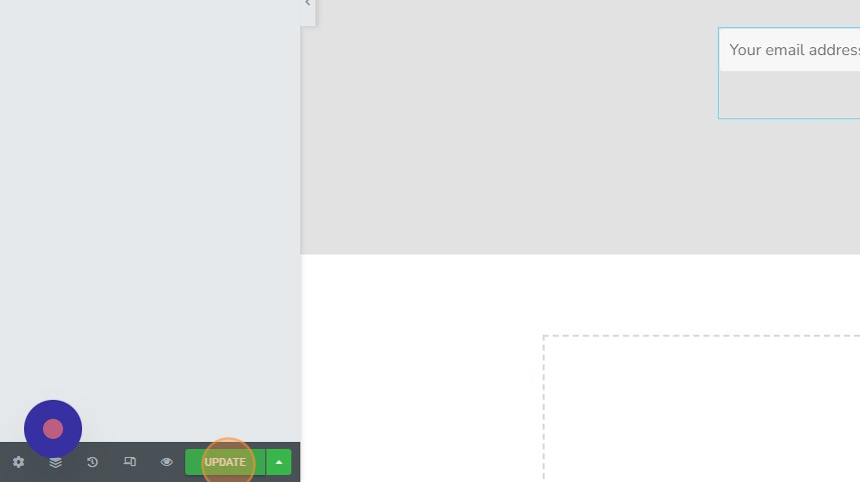
14. Once you are satisfied with your form, click the ‘UPDATE’ button on the left-hand side bottom to save the changes made.
![](https://ajeuwbhvhr.cloudimg.io/colony-recorder.s3.amazonaws.com/files/2023-05-18/eee84ff6-26ff-409b-b984-9b8f7a6ecd92/ascreenshot.jpeg?tl_px=0,480&br_px=859,961&force_format=png&width=860&wat_scale=76&wat=1&wat_opacity=0.7&wat_gravity=northwest&wat_url=https://colony-recorder.s3.us-west-1.amazonaws.com/images/watermarks/FB923C_standard.png&wat_pad=201,437)