Installing GreyboxPro
- Last Updated March 30, 2023
Overview
Congratulations on your purchase of GreyboxPro. This guide will take you through the process of installing, activating and initial configuration of GreyboxPro on your WordPress website.
Installation of GreyboxPro will take 5 simple steps:
-
1Installing the GreyboxPro Theme.
-
2Installing and activating the GreyboxPro Plugin.
-
3Installing other required plugins.
-
4Importing the GreyboxPro components and styles (demo data).
-
5Basic configuration of your GreyboxPro website.
Please note that if you have chosen a plan with setup included then you can sit back and relax, the GreyboxPro team will do this installation for you. If you haven’t chosen setup in your plan and would like to upgrade, please contact sales@greyboxpro.com
-
1
Installing the GreyboxPro Theme
Please note that this installation process assumes that you have already setup your hosting account as well as your base WordPress install.
Let’s start by downloading the GreyboxPro theme. You would by now have received an email or been taken to your Account within GreyboxPro after you’ve purchased it. In the your Account and the email there is a link to download the GreyboxPro theme, click the link and download it.
You will see a zip file called greyboxpro-theme-and-data.zip

Unzip this file. Once this file has been unzipped open the folder and you will see a data folder, a zip file called greyboxpro-theme.1.1.6.zip and a read me file. (please note that the version number will change so do not worry if you have a different version to this, the theme is updated all the time).

Now, login to your WordPress account on your website, this is normally https://yourdomain.com/wp-admin
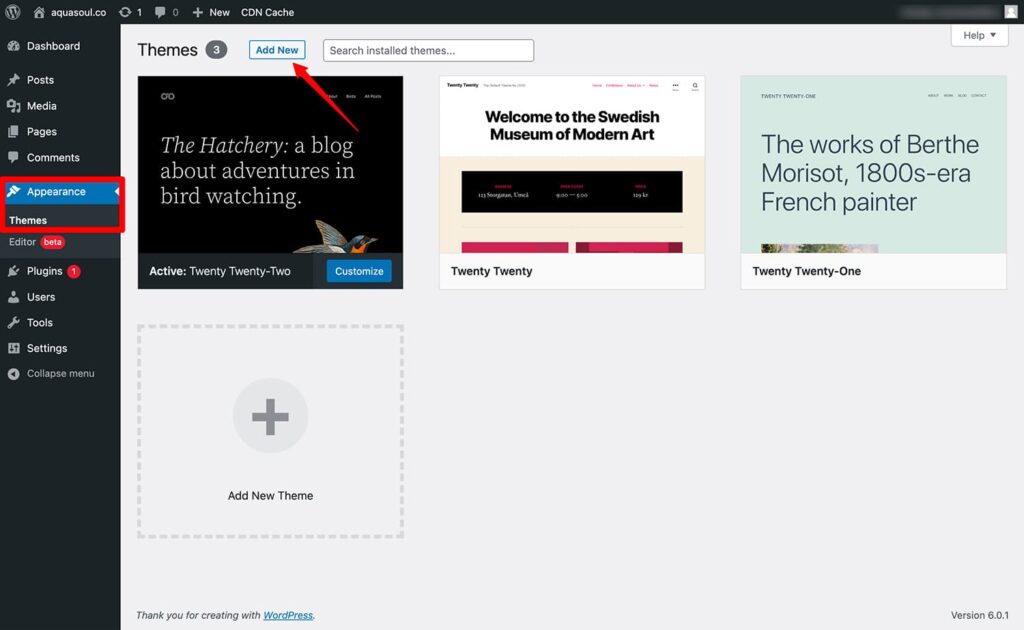
Once you’ve logged in, you will be taken to the WordPress dashboard. On the dashboard navigate to Appearance / Themes.
On the themes page, select Add New at the top of the screen.
On the Add Themes page, select Upload Theme at the top of the screen.
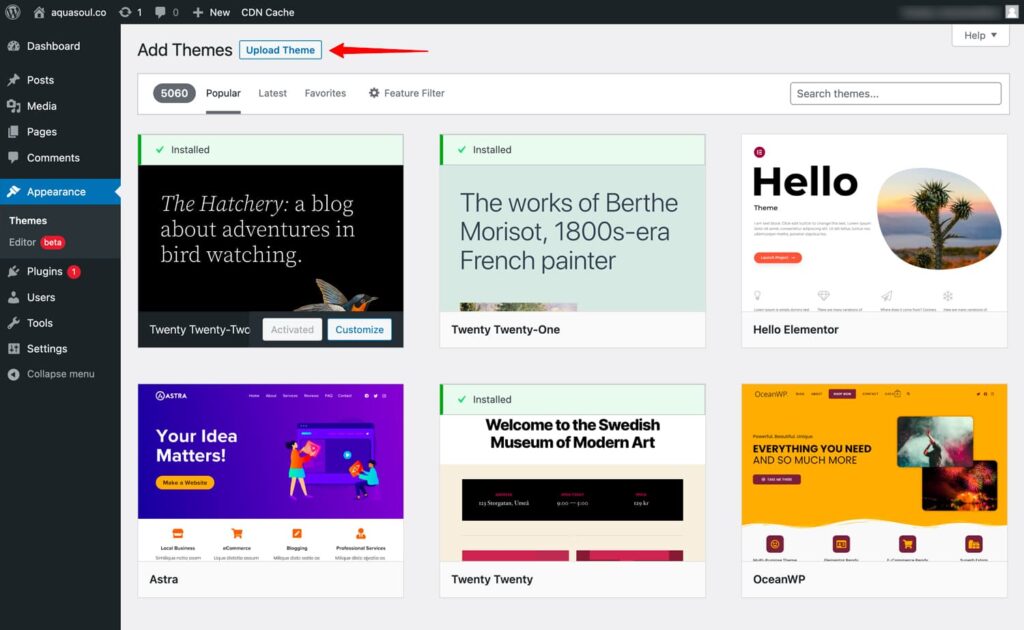
You will be given the option to upload your theme. Select Choose file and navigate to the place where you have downloaded and unzipped the GreyboxPro theme. Select the zip file of the theme, this will be called greyboxpro-theme.1.1.6.zip (please note the version will change).

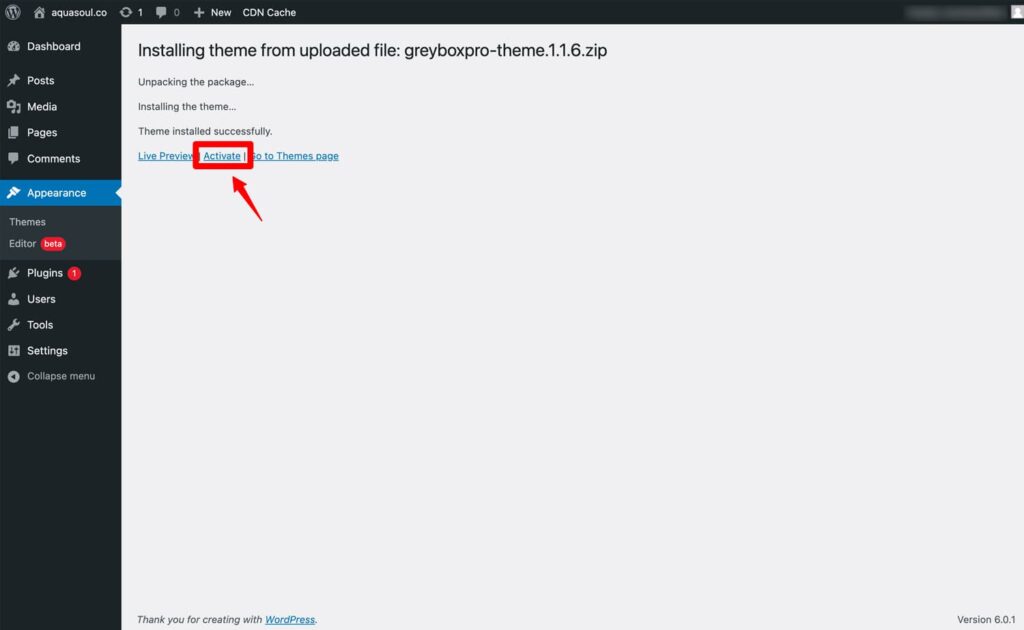
Now press the Install Now button. This will install the GreyboxPro theme on your WordPress website.
The theme may take a few minutes to install but once it has installed you will receive a message that the theme has installed successfully. To make the theme active on your website click the Activate link.
-
2
Installing and activating the GreyboxPro Plugin
Now download the GreyboxPro plugin. On your order email or in your Account use the link to download the plugin. This link will be greyboxpro-plugin.1.1.3.zip (please note the version will change)
You will now have a zip file of the theme called greyboxpro-plugin.1.1.3.zip.
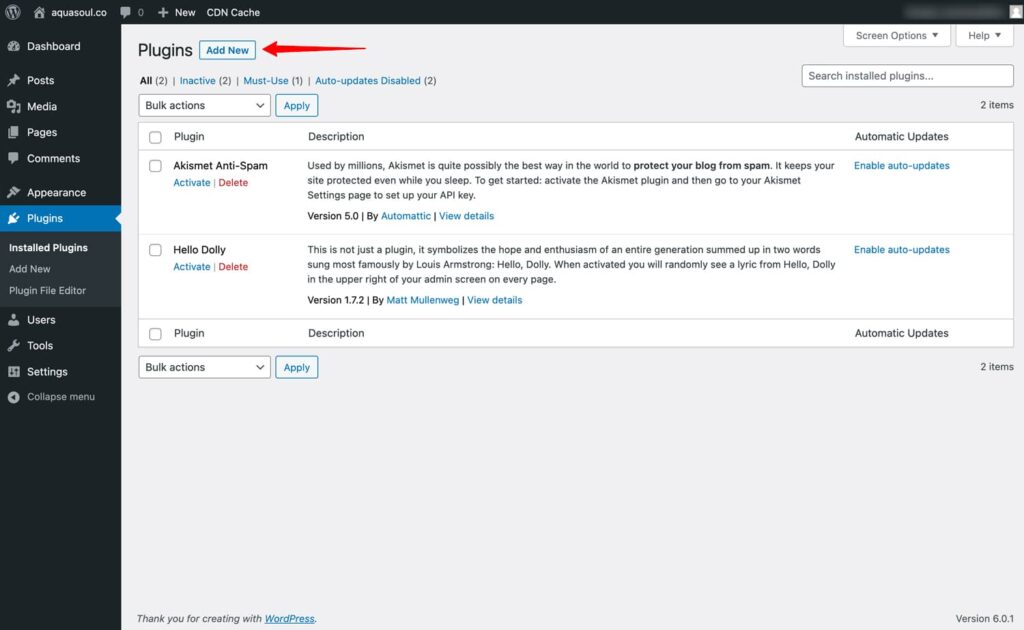
In your WordPress admin area click on Plugins in the WordPress menu.
On the Plugins page, select Add New at the top of the screen.
On the Add Plugins page, select Upload Plugin at the top of the screen.
You will be given the option to upload your plugin. Select Choose file and navigate to the place where you have downloaded the plugin. Select the zip file of the plugin, this will be called something like greyboxpro-plugin.1.1.3.zip..

Now click the Install Now button. This will install the GreyboxPro plugin on your WordPress website.
The plugin may take a few minutes to install but once it has installed you will receive a message that it has installed successfully. To make the plugin active on your website click the Activate Plugin button. You will now see GreyboxPro in the top left-hand corner of the WordPress admin menu.
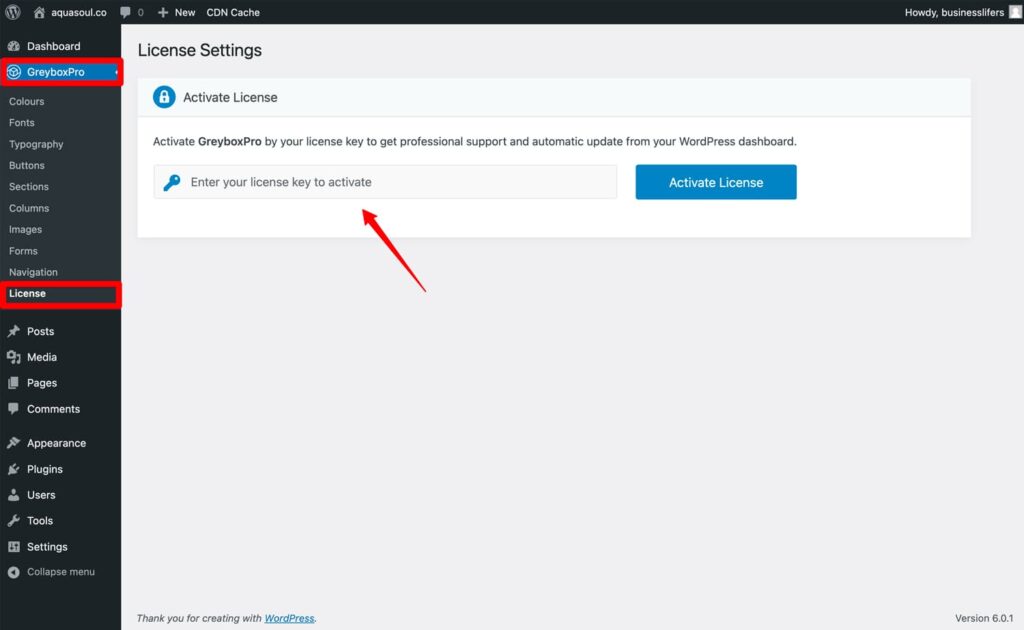
Now you will need to add your GreyboxPro license. You will have received the license in the same email or your account provided to you after your purchase. Copy this license code.
In the WordPress admin menu click on GreyboxPro > license. Paste your license key and click the Activate License button.
-
3
Installing other required plugins
There are a couple other plugins we use within GreyboxPro that you will need to install (please note that these are required to use some functionality and there may be licensing costs associated with these). These plugins include:
-
1
Elementor and Elementor Pro
You will need the basic and pro version. They are used to create your sites wysiwyg editing experience. -
2
Gravity Forms
Gravity forms – this is the plugin used in GreyboxPro to create forms for your site. If you do not wish to have any forms on your website then you do not need to purchase this one.
Installing Elementor
Elementor is the page builder used for wysiwyg editing of your site. You will need to install two versions of Elementor: Elementor and Elementor Pro. Elementor is free to use and provides good functionality. Elementor Pro is a paid plugin. It is extremely powerful and is used in a lot of the GreyboxPro components.
Firstly purchase your plugin here.
Next install your plugin using detailed installation instructions at Elementor Help Center here.
IMPORTANT! Once you have completed the installation of Elementor, return here to install other plugins and finalise your configuration.
Installing Gravity Forms
Gravity Forms is the custom form builder used to create contact, subscribe and other forms on your website. You will need to purchase a license (please note that the basic plan is all that is required).
Firstly purchase your plugin here.
Next install your plugin using detailed installation instructions, at Gravity Forms Help Center here.
IMPORTANT! Once you have completed the installation of Gravity Forms, please return here to install other plugins and finalise your configuration.
-
4
Importing the GreyboxPro components and styles
We have pre-built styles, pages and components in GreyboxPro. This step will install these onto your site so that you can make use of them.
Important! You must install the data first before you install the template kit. There are two parts to this installation, please ensure you follow these instructions carefully and do them in order.
Install Data
On the WordPress menu click Tools > Import.
On the import page, go to WordPress and click Install Now.
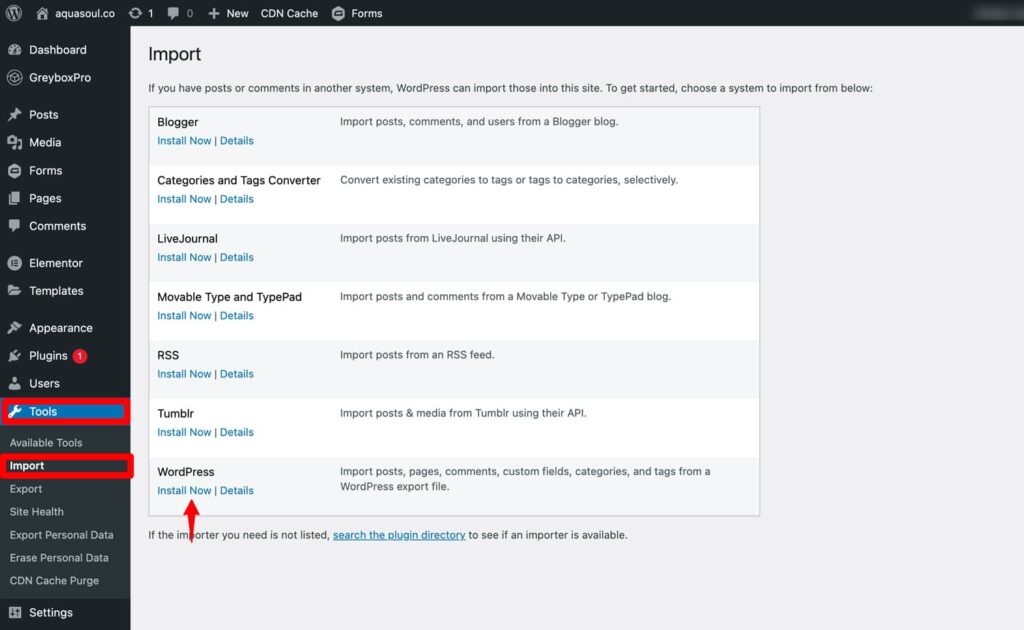
After the install process has finished, Select Run Importer.
Select Choose File and browse your computer to the place where you have downloaded and unzipped the GreyboxPro theme. Select the data folder, and then the file called greyboxpro-wordpress-import.xml. Click the Upload file and import button.

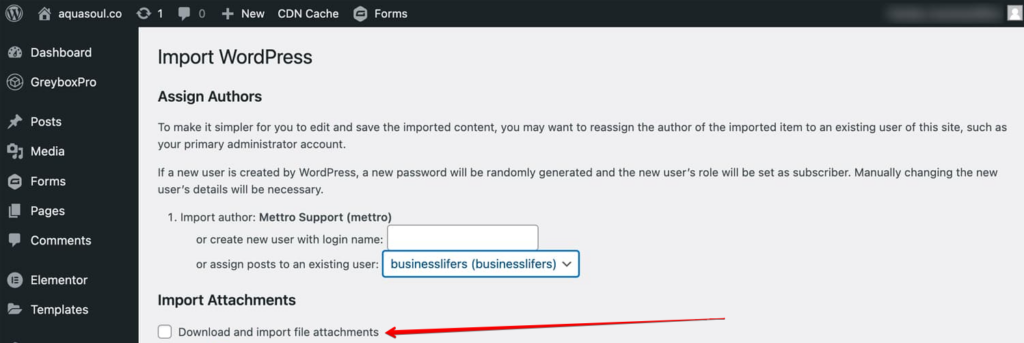
You will see a screen called import authors. You will be asked to select the Author of the posts (please note that these are only for the posts being installed by GreyboxPro and these can be changed at anytime).
IMPORTANT! Ensure you check the checkbox for Import attachments: Download and import file attachments.
Click submit. The import process will begin. Do not navigate away from this screen until process is completed.
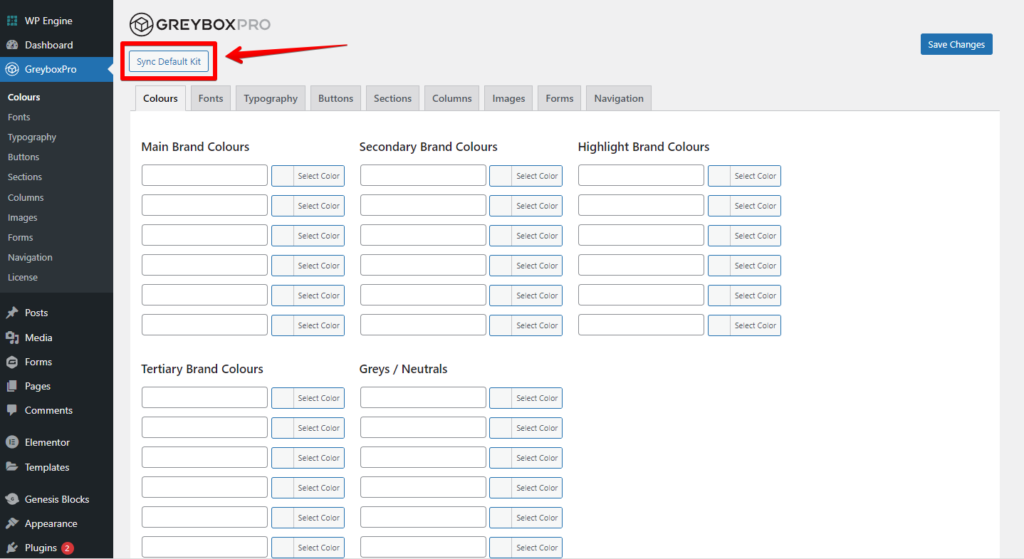
Sync Default Kit
To sync the default kit, on the WordPress menu click GreyboxPro menu.
Click the Sync Default Kit button.
-
5
Basic configuration of your GreyboxPro website
Now we have to do some basic configuration of your website in order to make sure it is setup properly from the start.
Important! Updating Elementor settings is crucial.
Updating the settings as per instructions below will allow GreyboxPro to control the global stylesheet both in WordPress and in Elementor, enabling you to make updates across the site easily.
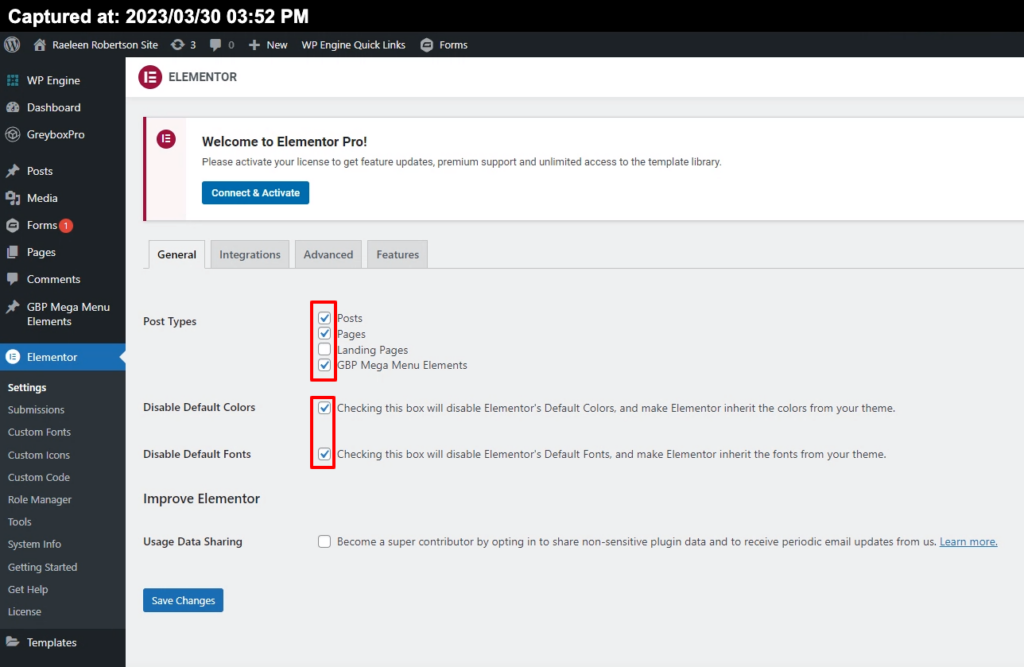
On the WordPress menu select Elementor > Settings
You will see four post types options: Ensure Posts, Pages and GBP Mega Menu Elements are ticked.
You will see two other options: Disable Default Colors and Disable Default Fonts.
Ensure both of these checkboxes are checked and click Save Changes
-
Congratulations & Next Steps
Congratulations, you have now setup GreyboxPro. There are a few important steps to get a clickable website happening. Please follow the instructions in the following tutorials:
-
1
Hooking up your homepage
This video will take you through how to select the homepage for your website. -
2
Setting up your header and footer menus
This video will take you through setting up your header with the right menu. -
3
Hooking up your project categories
We’ll get your project categories sorted in this video so that you can use the project list pages perfectly. -
4
Setting up Footer Subscription Form
Let’s get your footer email subscription sorted in a flash with this simple video.