1. Login to your website wp admin dashboard eg: https://greyboxprod.wpengine.com/wp-admin/
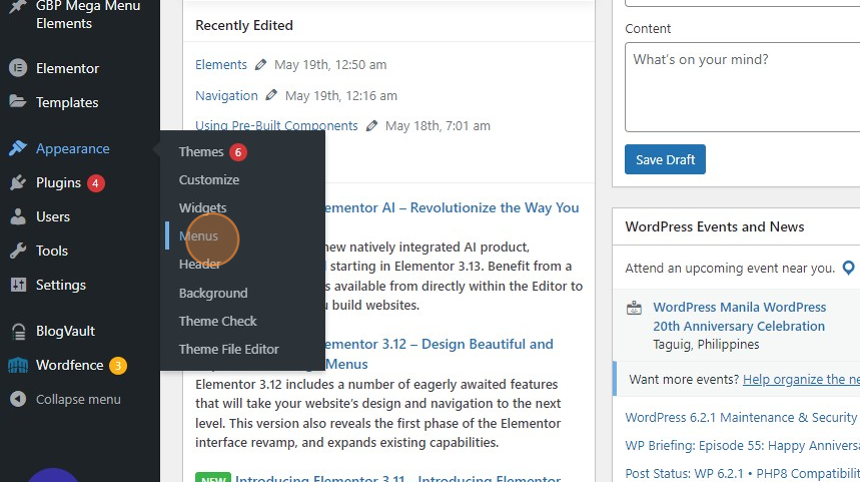
2. Click on ‘Appearance > Menus’ in the left hand side menu.
3. Click ‘create a new menu’
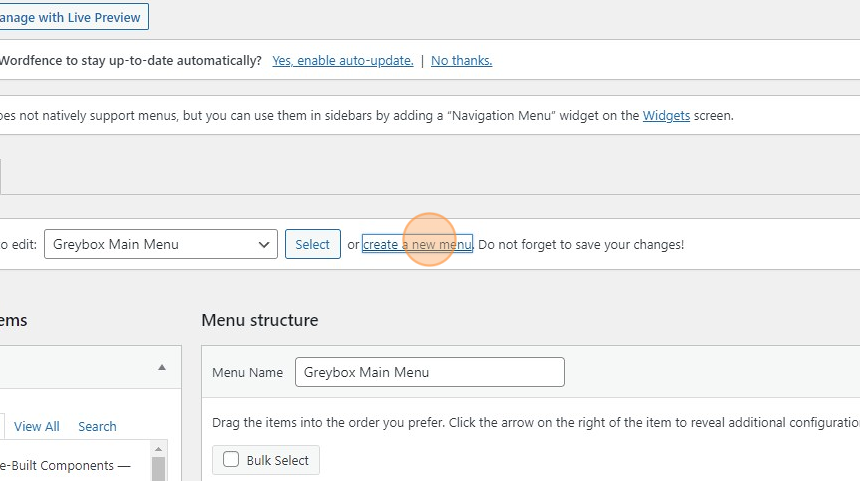
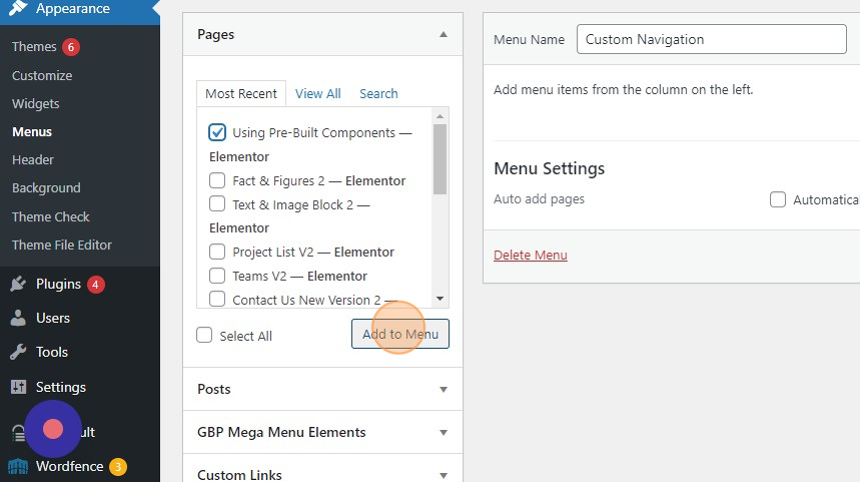
4. On the ‘Menu Name’ type “Custom Navigation” on the textfield.

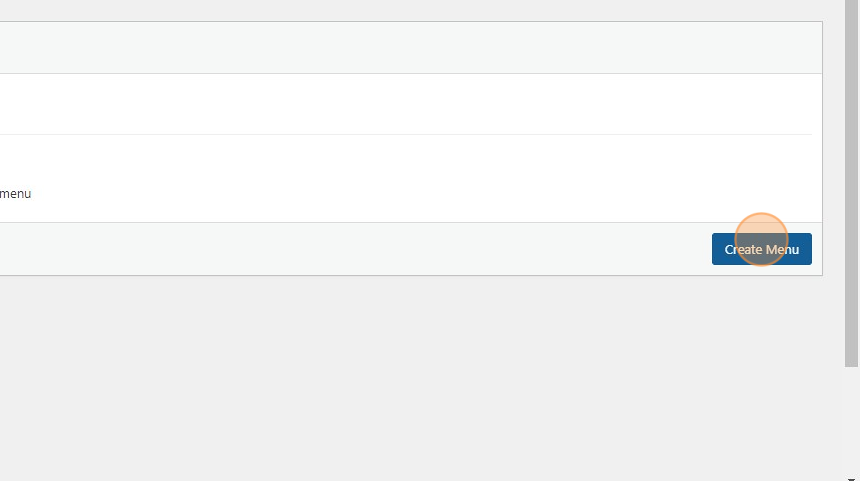
5. Click ‘Create Menu’ button to create a new custom menu
6. On the left-hand side of the menu section, Click any menu items you want to add. Example: ‘Using Pre-Built Components — Elementor’ and click ‘Add to Menu’.
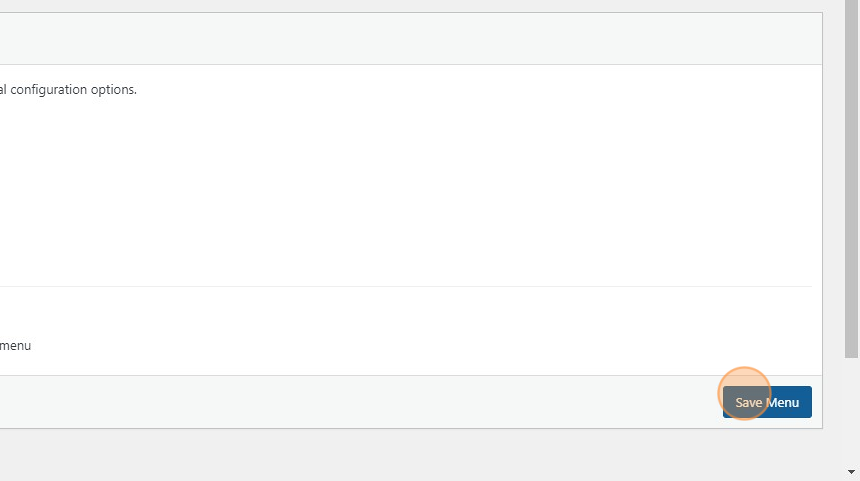
7. Click ‘Save Menu’ button to save changes.
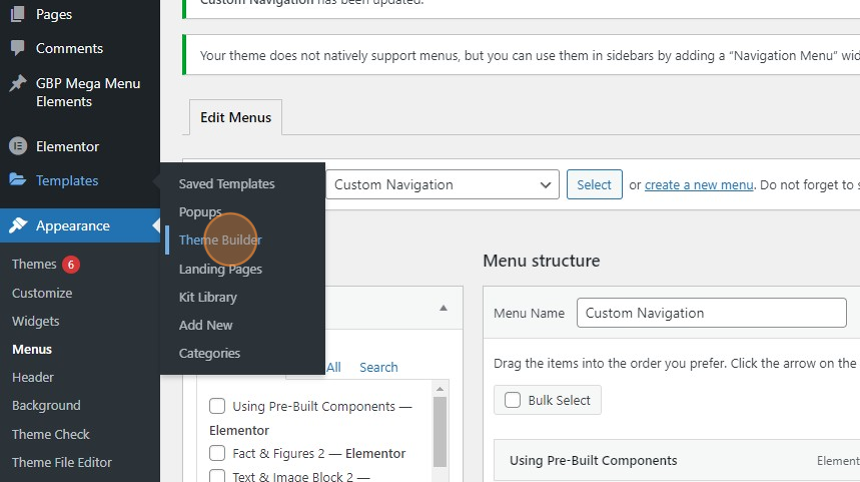
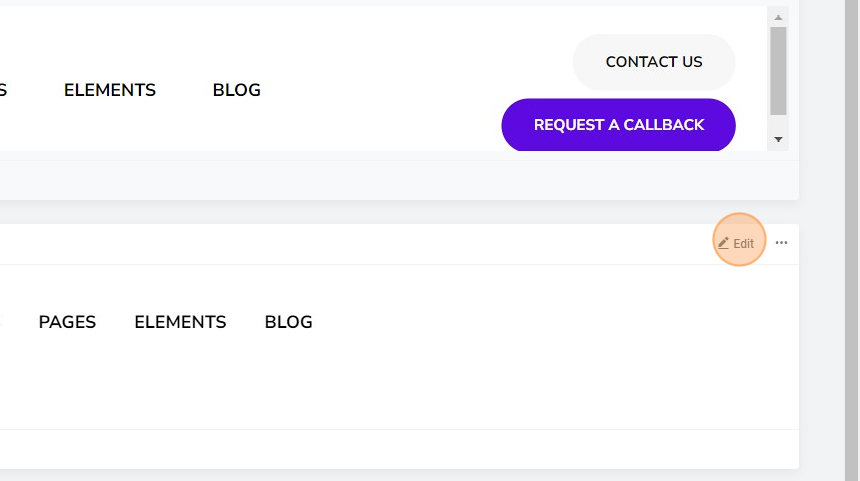
8. Click on ‘Templates > Theme Builder’ in the menu at the left-hand side
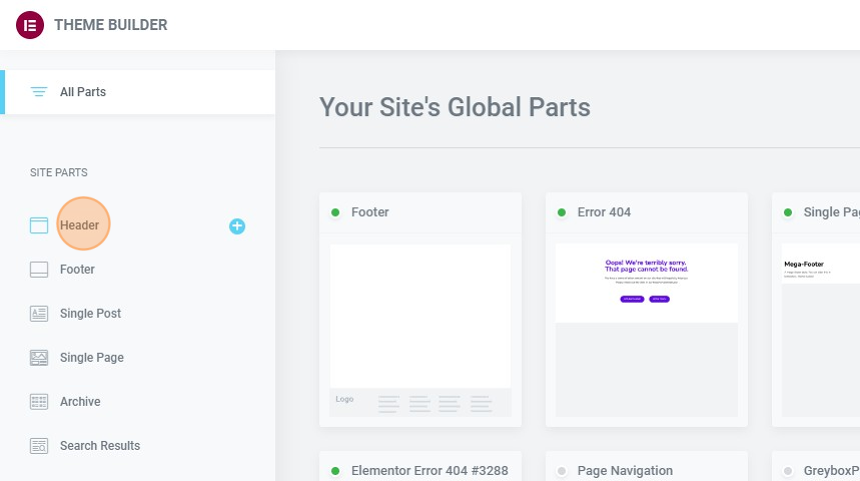
9. On the left-hand side you will see the ‘SITE PARTS’, click on ‘Header’ and header section box will appear.
10. Click ‘Edit’ for the main menu header template on the right-hand side
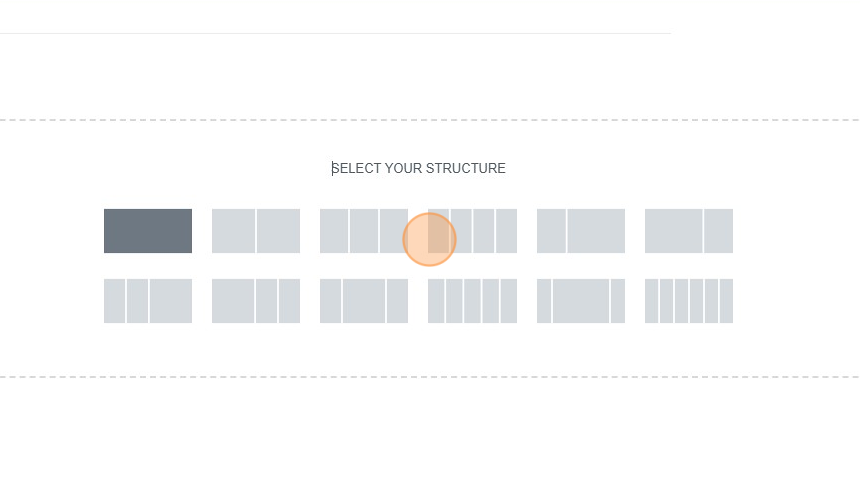
11. To insert a navigation widget, add a new section/column by clicking the plus sign (+)

12. New ‘section’ has been added.
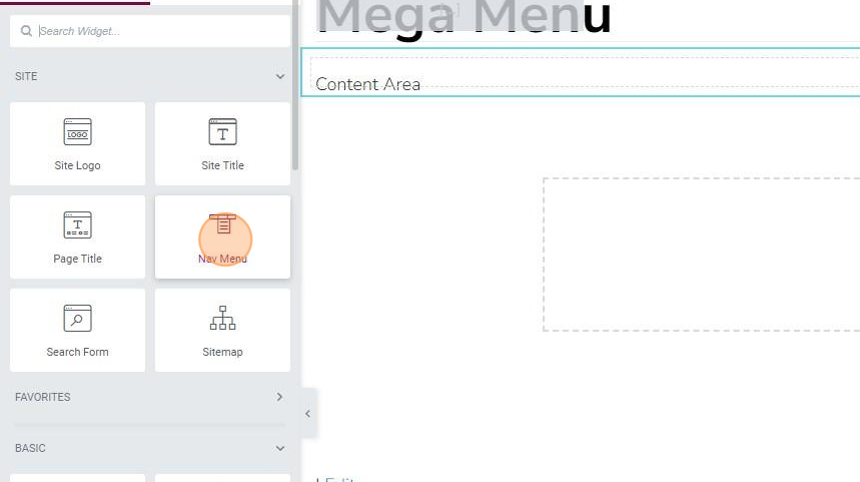
13. On the left-hand side. Drag and drop the ‘Nav Menu’ widget on the section added. If not seen on the available choices, type/ search on the ‘search widget’.
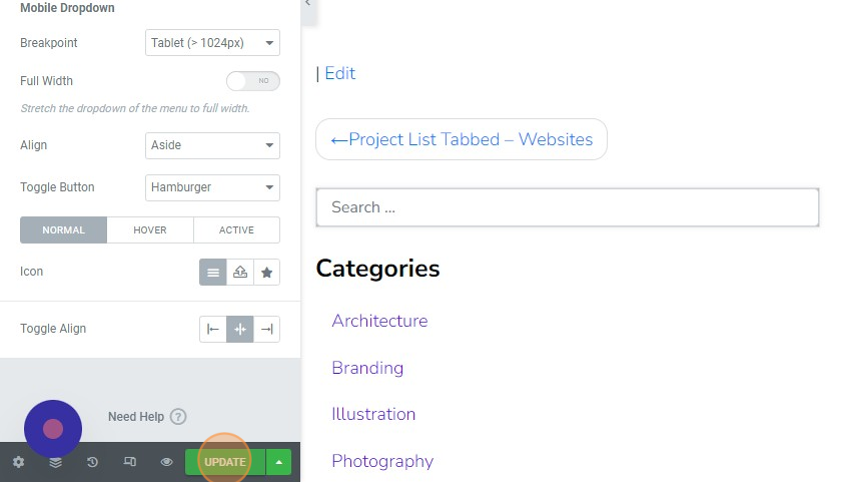
14. On the bottom left-hand corner of your screen click the ‘UPDATE’ button to save the changes made.